Recently I decided to learn how to write scripts in the Gimp image-editing program to automate certain tasks. The first task I wanted to automate was the Orton effect. This is an effect invented by Michael Orton in the 1990s, which consists of taking two copies of an image, one blurred, and one sharp, and mixing them to produce an image with a dreamy quality. It is especially well suited to landscape and flower photography.
The Orton effect was originally achieved by taking two photos: a well-focused image that was overexposed by two stops, and an out-of-focus image of the same scene that was overexposed by one stop. These were then printed as slides and sandwiched together to produce the final image.
With digital photography, one way to achieve this effect is to shoot a single raw image of a scene. The raw image can be developed to two JPEGs, one at +1 EV (Exposure Value), and the other at +2. My script blurs the +1 EV image with a two-dimensional Gaussian filter, with a standard deviation of 40 pixels, loads the second +2 EV image, sharpens it with an unsharp mask and then overlays the two images. There are a variety of ways the images can be overlaid, but I prefer to multiply them, which enhances the color saturation in light areas. This is done by the Gimp by calculating (blur layer נsharp layer) / 255, which results in the image darkening and an increase in color saturation.
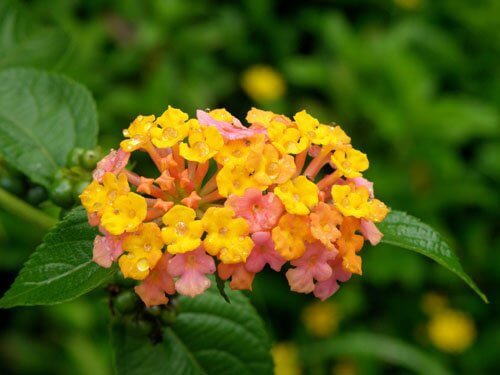
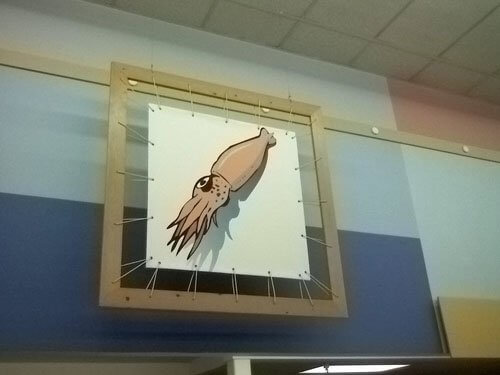
Original
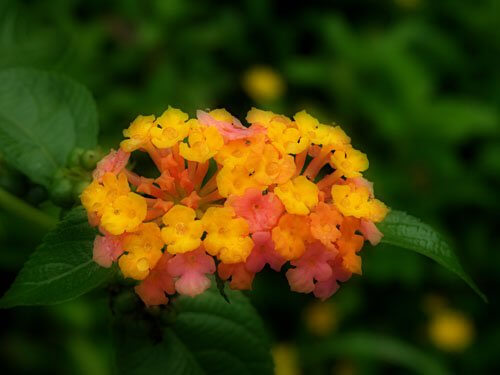
Orton
My Gimp script to do this is available on the Gimp plugin registry.
The soft focus of the colors and the sharpness of the image got me thinking: Is the Orton effect really equivalent to heavily subsampling the chroma channels of the image and sharpening the luma channel? JPEG and MPEG compression both make use of the fact that the human eye is not as sensitive to chroma (color) as it is to brightness (luma). Typically, both still and video compression uses 4:2:0 chroma subsampling to reduce the number of bits used to represent color information in compressed images without a perceptible quality difference to the human visual system.
I decided to test my theory. It turns out the Gimp has the ability to decompose an image into its YCbCr luma and chroma components used in the JPEG and MPEG compression process.
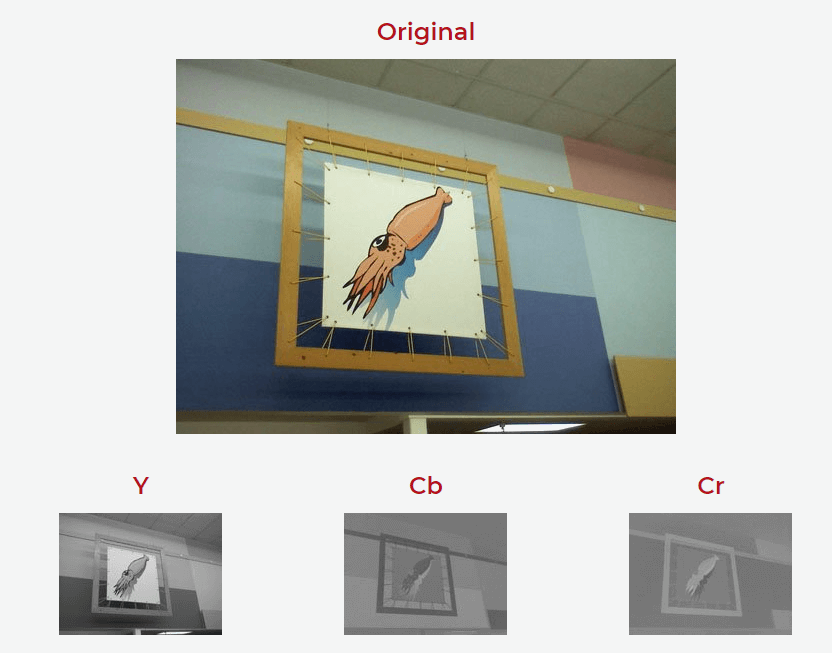
Once I had the image split into its separate components, the Gimp allowed me to apply my Gaussian filter to just the Cb and Cr components, and then regenerate a new color image from the components.

A Gaussian filter applied to just the chroma planes
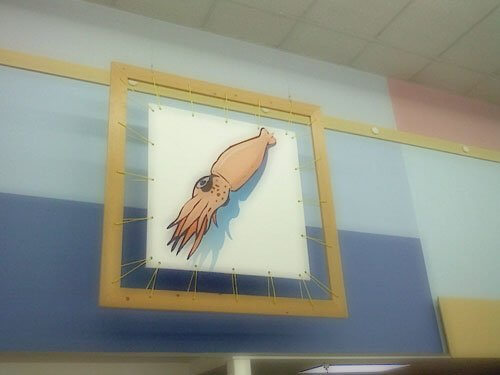
The same picture using the Orton effect plugin above
Unfortunately, as you can see, the image is nothing like the image that underwent Orton processing — my intuition was wrong. However, it is interesting to see just how much one can low-pass filter an image without a huge impact on the image. I increased the standard deviation of my Gaussian filter from 40 pixels to 100 with the following result — the image is still recognizable and doesn’t look too bad, although the color bleeds outside the lines. It’s interesting to note that the resulting JPEG is also smaller because the low-pass filtered chroma information is easier to compress.
A 100-pixel Gaussian filter applied to the chroma planes
Additionally, it is interesting to see what happens if we decompose our squid into RGB components instead of YCbCr and filter two of them with a 100-point deviation Gaussian filter.
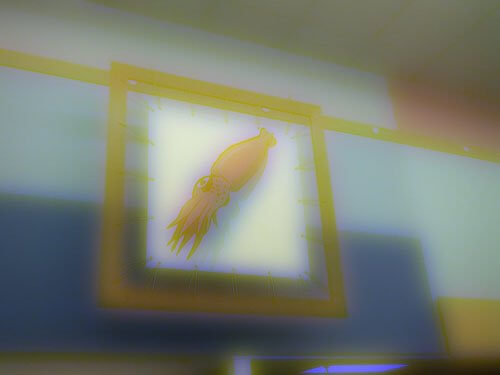
A 100-pixel Gaussian filter applied to two of the three RGB planes
Yuck. We can clearly see the advantage of chroma subsampling here over RGB subsampling.